


Yaheetech Garden Potting Bench Table - Outdoor Garden Patio Wooden Storage Cabinet & Solid Wood Planting Work Bench with Large Space Storage & Metal-Plated Tabletop, Brown
This is an affiliate link. Buyyyah may earn a commission if you buy through it, at no extra cost to you.
Description
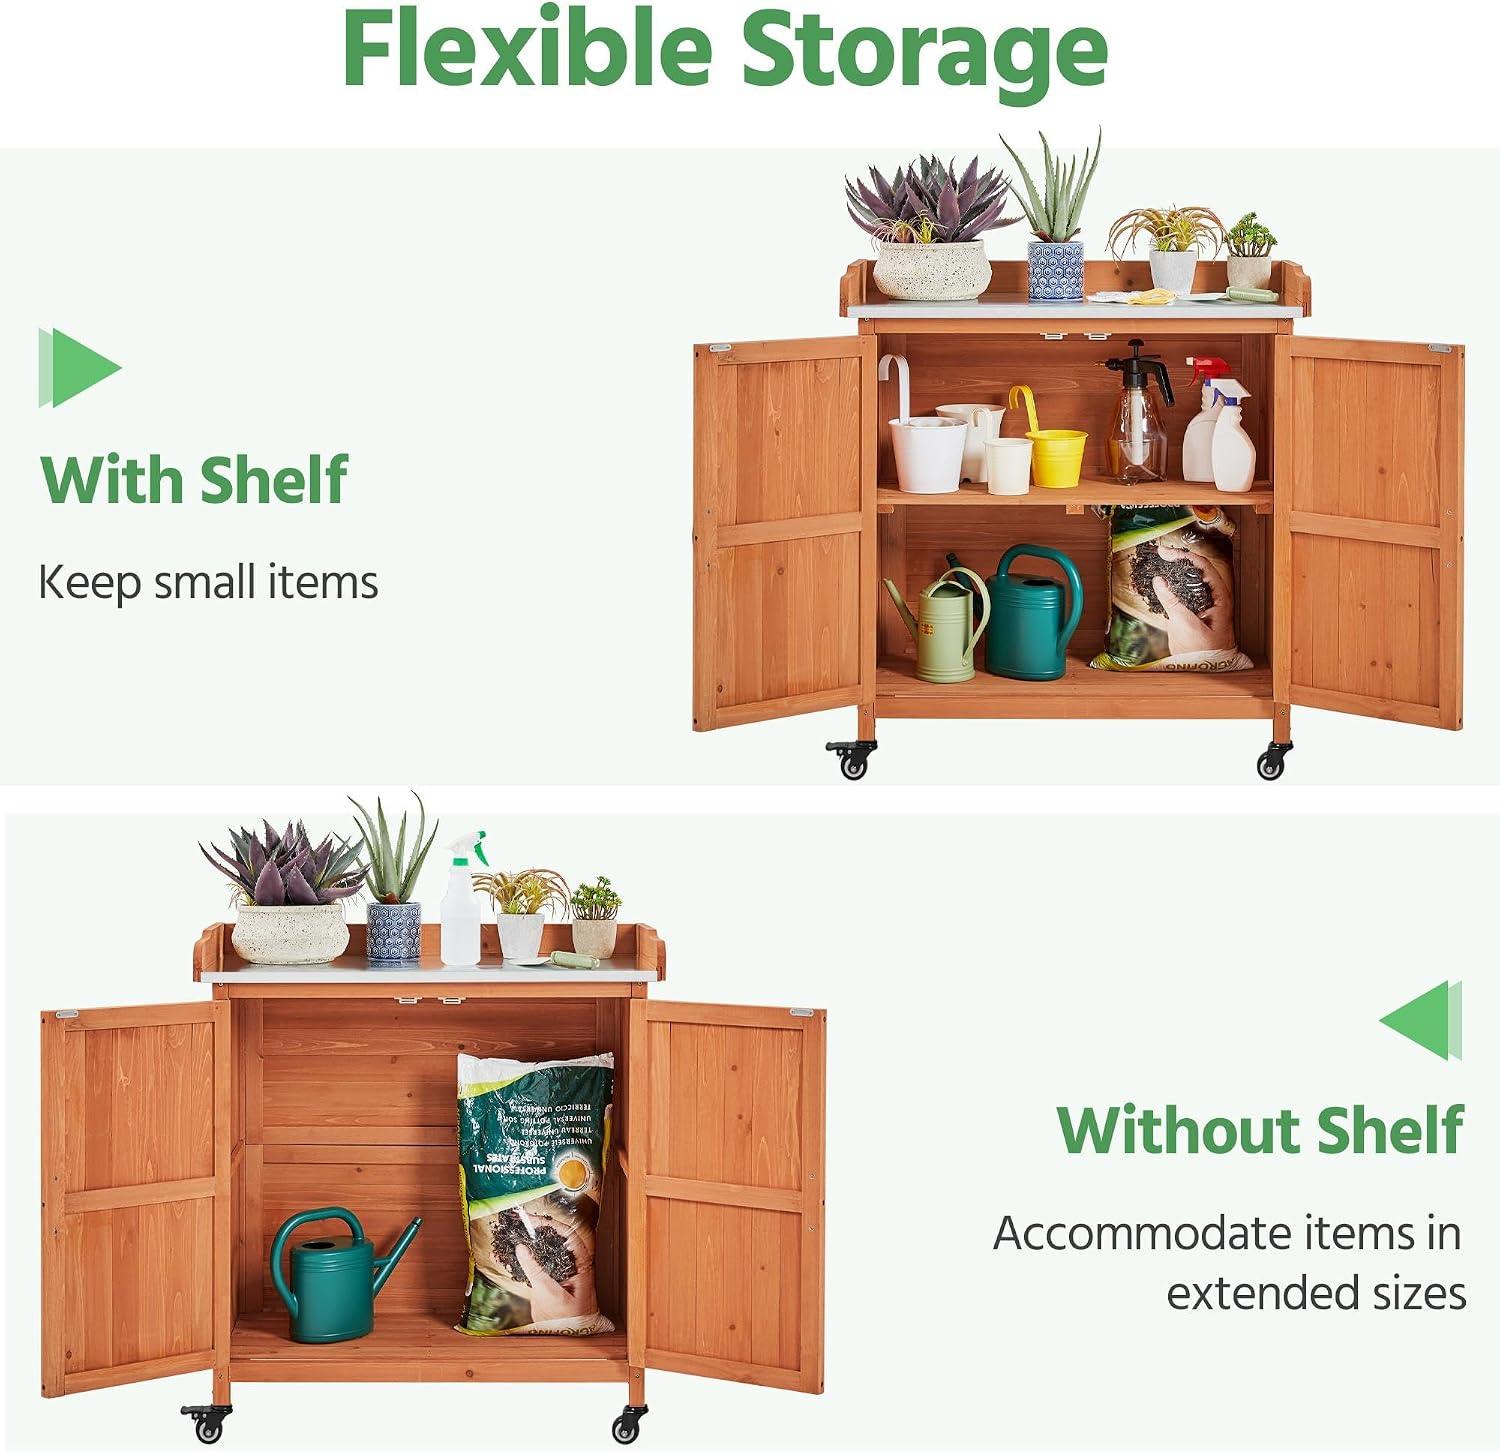
• Your Mobile Multi-Purpose Hub: Move this outdoor storage cabinet on four smooth castors (two lockable) around your patio, garden, or backyard. The durable, easy-clean metal top handles potting, outdoor cooking, flower arranging, or DIY projects—one station, endless possibilities • Spacious Metal Platform: This rolling potting bench features a spacious 34.3″ L × 15.2″ W platform with 2.6″ raised, anti-falling edges. Covered with a water-resistant galvanized metal sheet, it provides ample space for transplanting, pruning, and organizing, while being easy to clean and maintain • Generous Storage: This garden potting bench features two closed tiers of shelves, offering ample storage space for long-handled tools, lawn care equipment, watering cans, shovels, flower pots, and more. Keep your gardening essentials organized and easily accessible • Green Materials, Natural Beauty: This patio wooden workstation is made from solid fir, prized for strength, stability, and natural scent. The surface preserves wood grain and knots, making each piece unique—your companion as plants grow • Removable Shelf, Flexible Space: Need more room for your gardening tools? Simply remove or adjust the middle shelf to create a generous, customizable space for your accessories, offering you the flexibility to organize as needed
Details
General
- Brand Name
- Yaheetech
- Model Number
- YT-00118760VC
- Manufacturer
- Yaheetech
- Manufacturer Part Number
- YT-00118760
- Item Type Name
- Potting Bench Table
- Unit Count
- 1.0 Count
- Base Type
- Leg
Dimensions
- Item Dimensions
- 16"D x 36"W x 40"H
- Item Weight
- 33.9 Pounds
- Minimum Height
- 37 Inches
Capacity
- Load Capacity
- 154 Pounds
Assembly
- Required Assembly
- Yes
- Assembly Instructions Description
- Assembly required. Instructions included.
Materials
- Material Type
- Fir Wood, Galvanized Metal Sheet
- Frame Material
- Wood
Style
- Color
- Brown
- Finish Types
- Painted
Frequently asked questions
- What is the weight capacity of the potting bench?
- The load capacity is 154 Pounds.
- Is assembly required?
- Yes, assembly required. Instructions included.
- What is the tabletop made of?
- The tabletop is covered with a water-resistant galvanized metal sheet, making it durable and easy to clean.
Customer reviews
-

Construction is well thought out * Instructions could be better.
I am very pleased with this product...and the vendor. The original unit was destroyed in shipping, but the vendor immediately shipped a replacement which arrived in perfect condition. This cabinet appears well engineered to be reasonably sturdy. Perfect for storage on the porch for gardening stuff. As often is the case, the instructions could have been better. So I'll let you know what to watch out for: Most of the pages in the instruction booklet show one simple thing to do at a time. It almost seems too simple. But page 4 shows a lot going on and no sequence is specified. BEWARE...part number 6...which is easy to miss in the diagram as it appears already in place... MUST be installed before the side panel, part #3. Once the side panel is installed, you wont be able to get part #6...(the brace that goes under the top)... in place as it has tongues that need to fit into grooves on the side panels. Also, when you get to page 9, the diagram does not show which way the cabinet doors go on. There is a small metal strip at the upper corner of each door which needs to make contact with the magnets on the upper brace to hold the doors closed. That's how you'll know which way they go. The screw holes for the hinges on mine were not drilled properly and wanted the hinges to mount a little crooked. If yours don't look aligned, position the hinge so that the center screw hole is over a pre-drilled hole and carefully tighten it down while keeping the hinge properly aligned with the frame. Then the other screws will make their own holes (they're very sharp) . I had the same problem with alignment on a few of the screw holes drilled in the door panels. With attention to these few details, it should assemble quickly and easily. I hope this helps.
I am very pleased with this product...and the vendor. The original unit was destroyed in shipping, but the vendor immediately shipped a replacement which arrived in perfect condition. This cabinet appears well engineered to be reasonably sturdy. Perfect for storage on the porch for gardening stuff. As often is the case, the instructions could have been better. So I'll let you know what to watch out for: Most of the pages in the instruction booklet show one simple thing to do at a time. It almost seems too simple. But page 4 shows a lot going on and no sequence is specified. BEWARE...part number 6...which is easy to miss in the diagram as it appears already in place... MUST be installed before the side panel, part #3. Once the side panel is installed, you wont be able to get part #6...(the brace that goes under the top)... in place as it has tongues that need to fit into grooves on the side panels. Also, when you get to page 9, the diagram does not show which way the cabinet doors go on. There is a small metal strip at the upper corner of each door which needs to make contact with the magnets on the upper brace to hold the doors closed. That's how you'll know which way they go. The screw holes for the hinges on mine were not drilled properly and wanted the hinges to mount a little crooked. If yours don't look aligned, position the hinge so that the center screw hole is over a pre-drilled hole and carefully tighten it down while keeping the hinge properly aligned with the frame. Then the other screws will make their own holes (they're very sharp) . I had the same problem with alignment on a few of the screw holes drilled in the door panels. With attention to these few details, it should assemble quickly and easily. I hope this helps.
-
Well designed outdoor cabinet
We are using this to store spa supplies on our deck. Had a wasp nest inside the sticky sliding doors of the previous cabinet, so will be glad to have doors that just swing out now. This is typical tropical softwood, easy to work with though not very durable itself. It has a nice cedar color stain. I'd add a preservative if it is exposed to weather. All the parts and hardware/holes are placed exactly, no difficulty assembling it according to the clear directions and well-packaged & labeled hardware. I'd recommend also using a waterproof glue (a PVA like Titebond III, not one that expands given the tight joints) along with the supplied fasteners, otherwise they will eventually loosen. The only nit to pick is about the hinges & their screws. The holes in the hinges are not countersunk so the screw heads protrude unpleasantly. Also, be sure to screw them in by hand--the soft wood permits them to strip, though fortunately some tighten firmly. The doors nicely line up on attaching them without needing to shim or support them, if you set the cabinet on its back when you do so. The shelves drop in, and there's a lot of room inside. The top is thin aluminum sheeting, not a solid plate. Pull off the protective plastic before assembly; I didn't, and had to carefully cut along the edges where it got stuck. Overall, a good amount of storage at a fair price, attractive design & materials, easily assembled. We're happy.
We are using this to store spa supplies on our deck. Had a wasp nest inside the sticky sliding doors of the previous cabinet, so will be glad to have doors that just swing out now. This is typical tropical softwood, easy to work with though not very durable itself. It has a nice cedar color stain. I'd add a preservative if it is exposed to weather. All the parts and hardware/holes are placed exactly, no difficulty assembling it according to the clear directions and well-packaged & labeled hardware. I'd recommend also using a waterproof glue (a PVA like Titebond III, not one that expands given the tight joints) along with the supplied fasteners, otherwise they will eventually loosen. The only nit to pick is about the hinges & their screws. The holes in the hinges are not countersunk so the screw heads protrude unpleasantly. Also, be sure to screw them in by hand--the soft wood permits them to strip, though fortunately some tighten firmly. The doors nicely line up on attaching them without needing to shim or support them, if you set the cabinet on its back when you do so. The shelves drop in, and there's a lot of room inside. The top is thin aluminum sheeting, not a solid plate. Pull off the protective plastic before assembly; I didn't, and had to carefully cut along the edges where it got stuck. Overall, a good amount of storage at a fair price, attractive design & materials, easily assembled. We're happy.
-
Really like this cabinet.
Some reviews said this was hard to put together or understand the instructions. I found it easy to understand and put together. And I am quite pleased with the result. It looks nice, has plenty of storage and just what I needed. I think for the price it is just the right combination of sturdiness and quality. I would like to add that the only part of the instructions that I found confusing was the first step, where you attach a side panel or the top. I recommend looking at a picture of the product rather than just the drawing, as it is not completely clear in the drawing which edge is the front. Tools you will need are a Phillips head screw driver and pliers. A flat head magnetic screw driver is also handy for one step.
Some reviews said this was hard to put together or understand the instructions. I found it easy to understand and put together. And I am quite pleased with the result. It looks nice, has plenty of storage and just what I needed. I think for the price it is just the right combination of sturdiness and quality. I would like to add that the only part of the instructions that I found confusing was the first step, where you attach a side panel or the top. I recommend looking at a picture of the product rather than just the drawing, as it is not completely clear in the drawing which edge is the front. Tools you will need are a Phillips head screw driver and pliers. A flat head magnetic screw driver is also handy for one step.
-
Sturdy, looks great
Both of us really like the way this bench table came out. It’s sturdy and hides all of the tools that’s needed for the outside right on the lanai, making everything in its place, looking tidy. My husband said it was one of the easiest things he has put together. Everything was labeled.
Both of us really like the way this bench table came out. It’s sturdy and hides all of the tools that’s needed for the outside right on the lanai, making everything in its place, looking tidy. My husband said it was one of the easiest things he has put together. Everything was labeled.